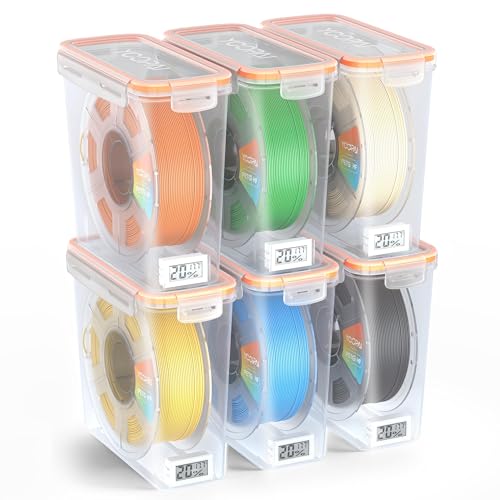
A cereal container can become a passive filament storage box only after the exact loaded spool, usable interior, closure, and feed path all check out. Measure the container at its narrowest points, keep every unused opening closed, use desiccant only as its maker directs, and test free rotation before printing from the box. This setup can slow renewed moisture exposure; it does not remove moisture already absorbed by filament and it is not a safe basis for an improvised heater.
Start with the filament storage routine, keep passive storage separate from active drying, and follow the desiccant maker's handling instructions. Compare documented alternatives in the storage collection.
Decide whether you need storage or active drying
Start by naming the job. This guide covers a non-heated enclosure for storing an already-prepared spool or feeding from a protected container. It does not turn a food container into an active filament dryer. Prusa makes the same functional distinction for its USS Drybox: the sealed box and desiccant slow moisture absorption, but already-moist filament must be dried separately.
If the exact filament instructions call for a drying cycle, follow those instructions in compatible purpose-built equipment before moving the spool into the box. Do not add a heater, mains-powered component, or unapproved hot-air source to a cereal container. Its plastic, seal, printed parts, bearings, and spool have not been established as a safe heated system by this measuring workflow.
- Storage-only: prioritize a continuous seal, simple access, and a protected filament end.
- Print-through: add verified rotation, an outlet that can close, and a low-resistance route to the printer.
- Active drying: use separate equipment and the exact material, spool, and dryer instructions.
Measure the loaded spool and usable container
Measure the widest flange diameter and the total loaded width of the exact reel you intend to store. Include a refill carrier, hub insert, axle, roller, bearing holder, or other part that will remain in the box. A one-kilogram filament label does not define a universal reel shape, so do not choose a cereal container from nominal capacity or outside dimensions alone.
Measure usable interior space where the spool will actually sit. Check the narrowest wall-to-wall width, the floor-to-lid height after the lid is latched, and any inward taper, handle recess, gasket, hinge, latch, or rounded corner. Then account for the supports and desiccant holder. The spool needs clearance while rotating; touching the lid or wall is not a successful fit even if the container can be forced closed.
- Loaded reel: maximum diameter, total width, hub opening, and anything left attached.
- Usable box: narrowest width, lowest closed-lid height, wall taper, and lid intrusion.
- Installed hardware: axle or rollers, end stops, outlet fitting, tube bend, and desiccant holder.
- Remaining movement: free rotation without flange rub, lid contact, or a pinched filament path.
Choose an axle or rollers without guessing the fit
An axle through the hub can be compact, but its supports and end clearance become part of the usable width. A roller cradle avoids relying on one hub diameter, yet the roller spacing must keep the actual spool stable and the flanges away from the walls. In either layout, support the reel in the direction shown by your chosen hardware and do not assume a community model fits a different container revision.
Assemble the box without filament threaded to the printer and rotate the loaded spool by hand through several turns. Look for a flange walking sideways, a carrier catching, loose filament dropping behind the reel, or a support shifting under the load. Secure the filament end before opening the lid so it cannot unwind into the seal or rollers. If the spool only turns when the lid is lifted or the box is distorted, revise the layout rather than treating it as ready.
Plan one closable feed path
For storage-only use, avoid drilling an opening you do not need. Every port adds another surface that must be closed. For print-through use, place the outlet so filament leaves the reel without crossing a flange or making an abrupt bend. Route it through a fitting or grommet appropriate to the filament and tube, then confirm the printer can load normally without the container pulling, tipping, or forcing the strand sideways.
Prusa's USS setup provides a useful product-specific pattern: orient the filament toward the outlet, secure the loose end, and close the grommet to reduce exposure. Transfer the questions, not the dimensions, to a DIY box. Verify your own outlet, tube, path, and printer because a commercial grommet arrangement does not validate a cereal-container modification. Cap the outlet whenever the box is used only for storage.
- Can the outlet close when no filament is threaded?
- Does the tube keep a gentle route without rubbing the container edge?
- Can the printer complete its normal load and unload routine?
- Will opening the lid leave enough slack to avoid pulling the printer or sensor?
As an Amazon Associate, we earn from qualifying purchases. Buying through our links may earn us a commission.
Comparing equipment? Review the documented limits before buying.
View Polymaker PolyDryer Box on Amazon ↗A relevant option to investigate, not a diagnosis or a universal recommendation.
Inspect the seal before adding desiccant
Close the empty container and inspect the entire gasket or sealing rim under good light. Confirm every latch reaches the same position and that the axle mounts, wires, hygrometer, label, and filament do not cross the seal. Check the container for cracks, warped surfaces, and unused holes. A lid that appears closed from the front can still have a gap at a hinge or handle recess.
Add only a contained desiccant format whose maker provides handling and service instructions, and keep it out of the spool's rotation and filament path. Desiccant does not compensate for an open port or a damaged seal. Do not copy an indicator color, regeneration temperature, or microwave/oven procedure from another product; packets, loose beads, cartridges, dyes, and holders can require different treatment.
Commission the box with a repeatable check
Place one identified, already-prepared spool in the box, record the date, close every latch and unused port, and let any air sensor stabilize according to its own instructions. A hygrometer reports the air near the sensor, not water inside the filament. Compare readings only when the box is in a similar location and temperature, and avoid promoting one percentage to a universal pass/fail target.
For a print-through layout, complete a supervised loading and short movement check before relying on it for a long print. Watch the box, tube, outlet, spool, and printer together. If resistance appears, stop and identify the contact point; do not assume moisture caused the feed problem. After each opening, confirm the seal, outlet cap, spool position, filament end, and desiccant holder have returned to their intended state.
- Record the exact spool, container, support hardware, and outlet configuration.
- Check latches, the full seal perimeter, unused openings, and free rotation.
- Keep air readings with temperature and elapsed stabilization time.
- Separate seal or feed-path failures from the decision to dry the filament.
Know when a DIY cereal-container box is the wrong format
Choose a different container or a documented storage product when the loaded reel cannot rotate freely, the lid cannot close without pressure, the feed path needs an unclosable opening, or you cannot inspect the seal. A storage bag may suit an infrequently used spool better than a bulky print-through box. A supported multi-spool system may be more manageable when several materials must feed at once.
Move to an active dryer when a named material procedure or a controlled comparison supports drying. A passive DIY box should receive the spool after that process, not substitute for it. Polymaker's modular PolyDryer architecture makes this separation visible: a Box stores the spool, while the separate Dry Dock supplies the active function. Your DIY enclosure should keep the same role boundary clear.
Sources and research notes
This guide synthesizes published guidance. It does not describe our own laboratory or hands-on product testing. Container and component examples apply only to the named product and configuration; verify every DIY part in its own instructions.